Last month seven ABW members went on Nigel’s navigation weekend to the Hattah Lakes. We all came with map and compass at the ready and GPS devices nowhere to be seen. Here’s what we found:
- It was a lot easier than we expected
- We were watching the terrain a lot more instead of our phones
- It was a lot of fun
So here’s what we learnt. Firstly, though, why learn this skill anyway?
- There will be times when phones get lost, break, or go flat
- Compass navigation enhances map reading skills
- There is a simple satisfaction in having and using the skill
There are many ways to use a compass. This short article will show you the most important:
- How to take a bearing from a map,
- Then follow it in the real world to arrive at your planned destination.
How To Set A Bearing On Your Compass
Note that in this first step you ignore the compass needle so it can even be done at home before your trip.
1. Identify your starting point on the map
To follow a bearing from a map, you need an accurate starting point. Either know exactly where you are by referring to your map regularly as you walk, or choose an unmistakeable landmark on your map and move to this point.
2. Choose your destination on the map
In the picture here, that’s the junction with Razorback Road.
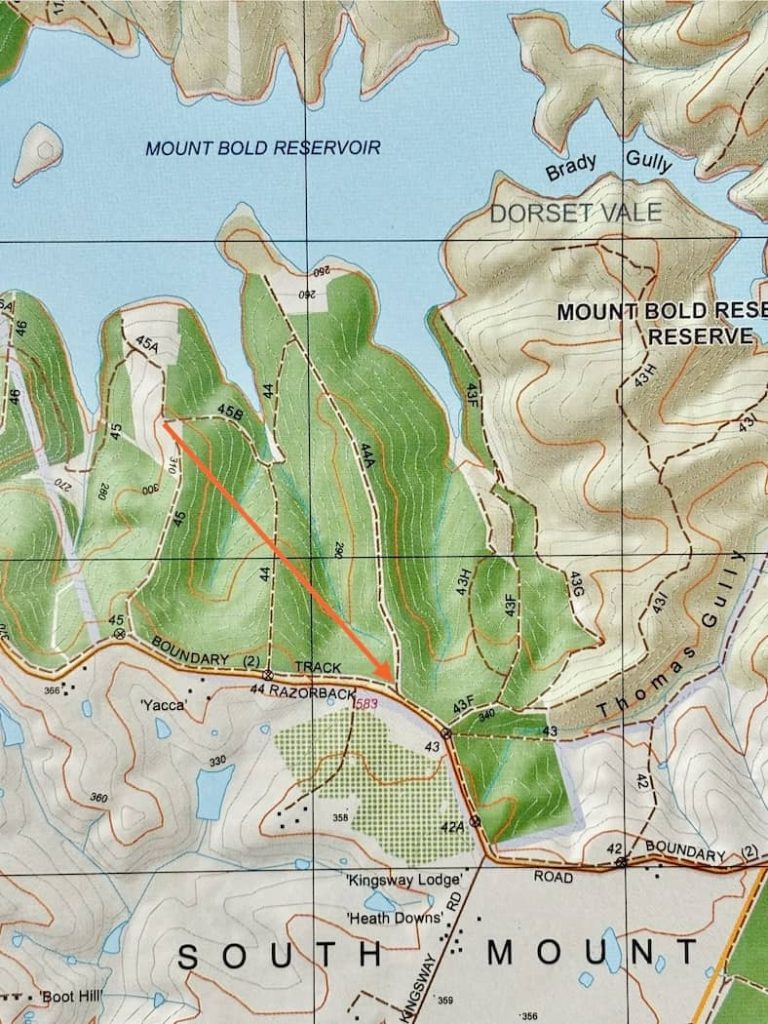
3. Put your compass on the map
Align it with the side of its base plate in line with your starting and finishing points and the large arrow on the base plate pointing in the direction you will be going.
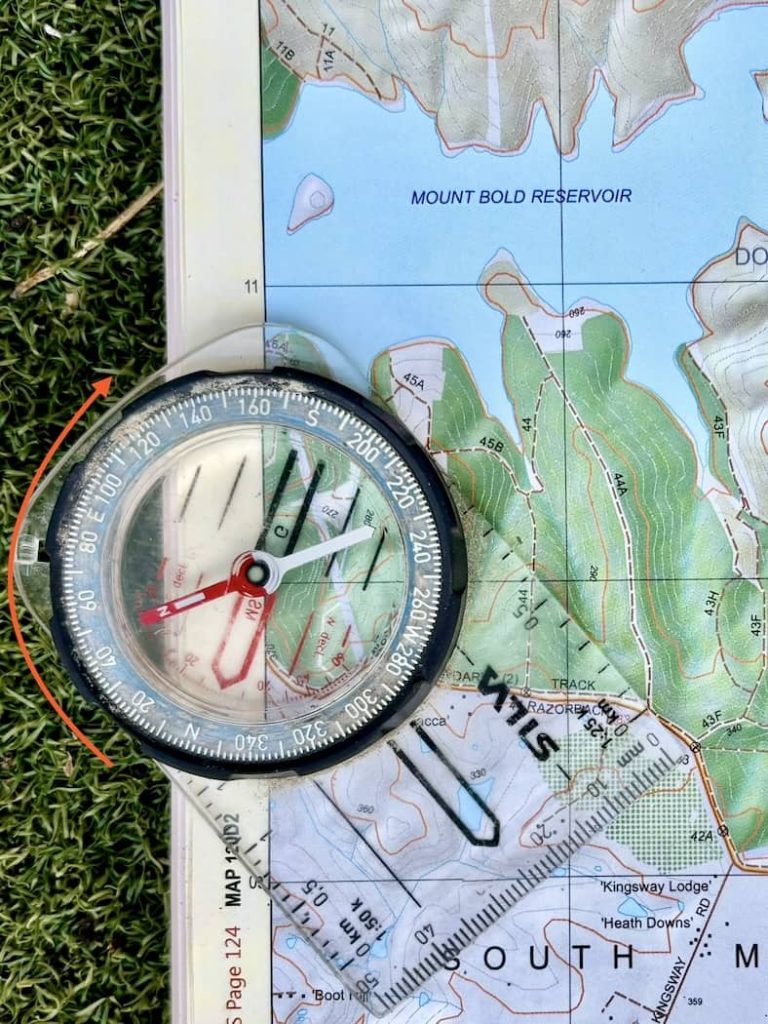
4. Now turn the bezel
Turn the round part until the grid lines visible in it line up with the grid lines on the map underneath and the red arrow on the bezel (not the needle; ignore this!) points to the map’s north. In the example, I’ve used a grid line on the map edge.
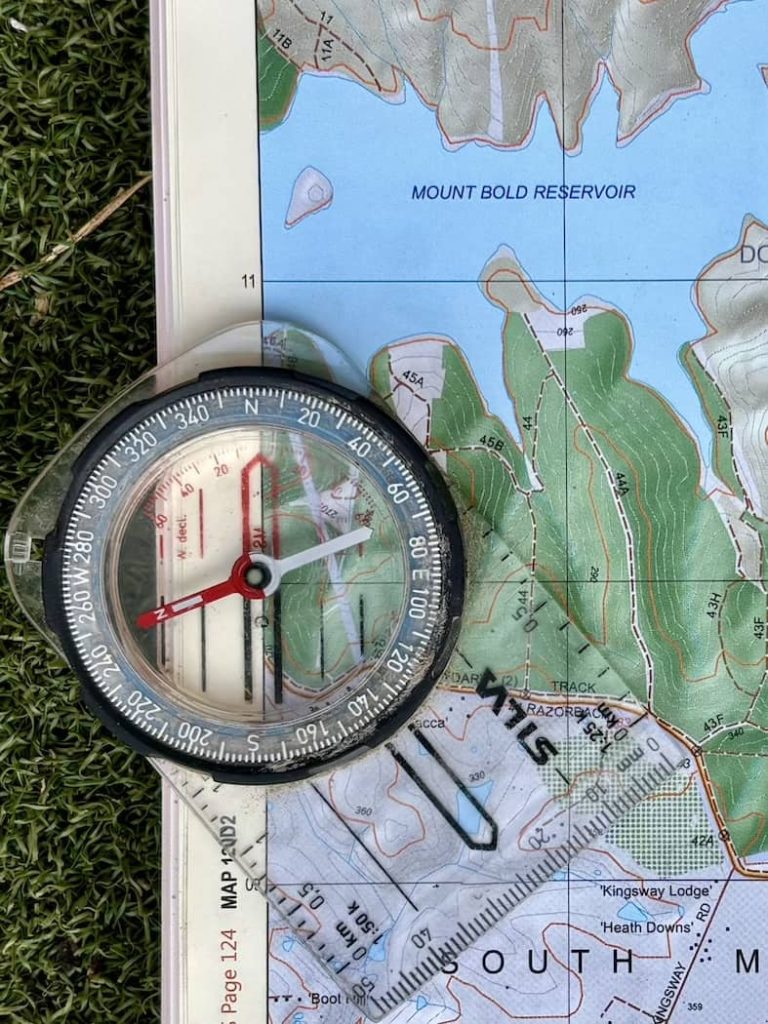
5. Take your compass off the map
You’re not finished yet! This number (138 degrees in the picture) needs to be adjusted for magnetic declination*.
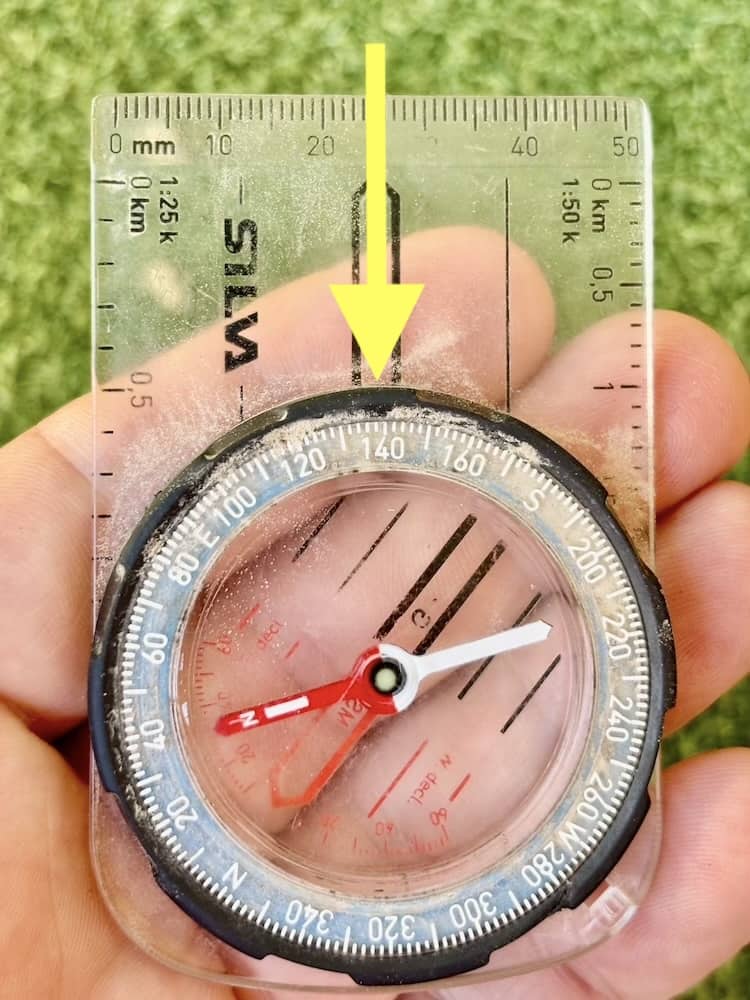
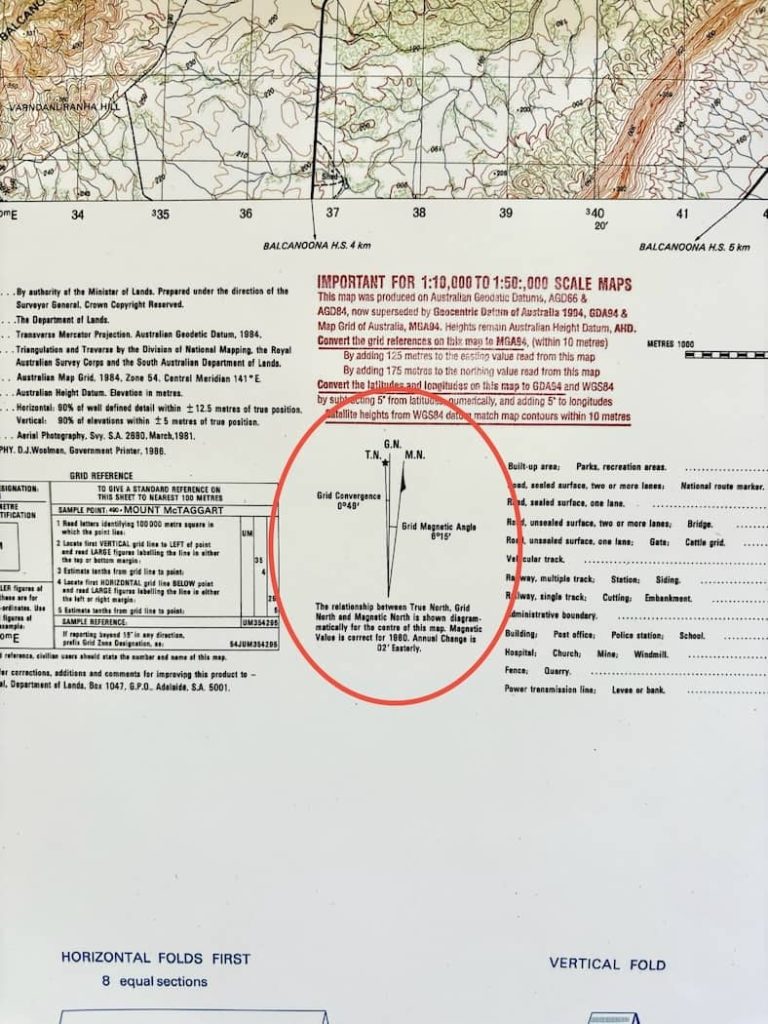
Find the declination for your local area either written in the map legend or as a diagram like the one pictured. You can even just Google it.
6. Subtract the magnetic declination
In Australia and New Zealand (except southwest WA), subtract this number from the bearing on your compass. Adelaide’s declination is 8ºE so my compass now reads 130 degrees.
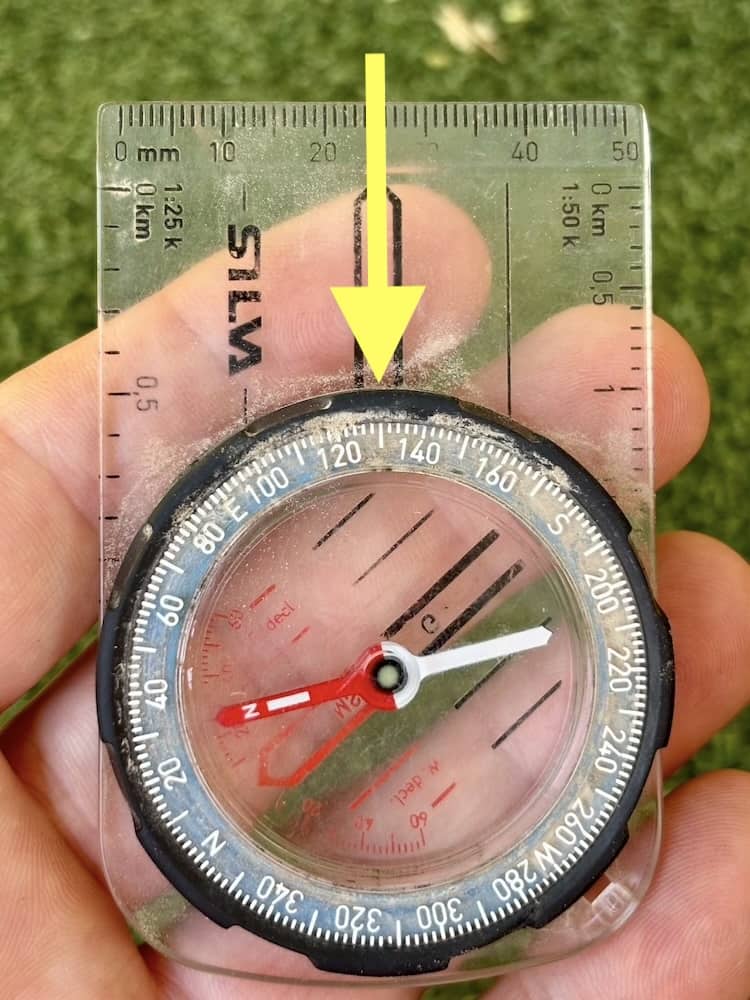
Now you’re ready to follow this bearing.
Note, by the way, that compasses usually have scales along each side of the plate for 1:25000 and 1:50000 maps. I’m using a 1:25000 map so a look at the picture under point 3 shows me I will be walking 1.1km (not allowing for vertical change).
How To Follow A Compass Bearing
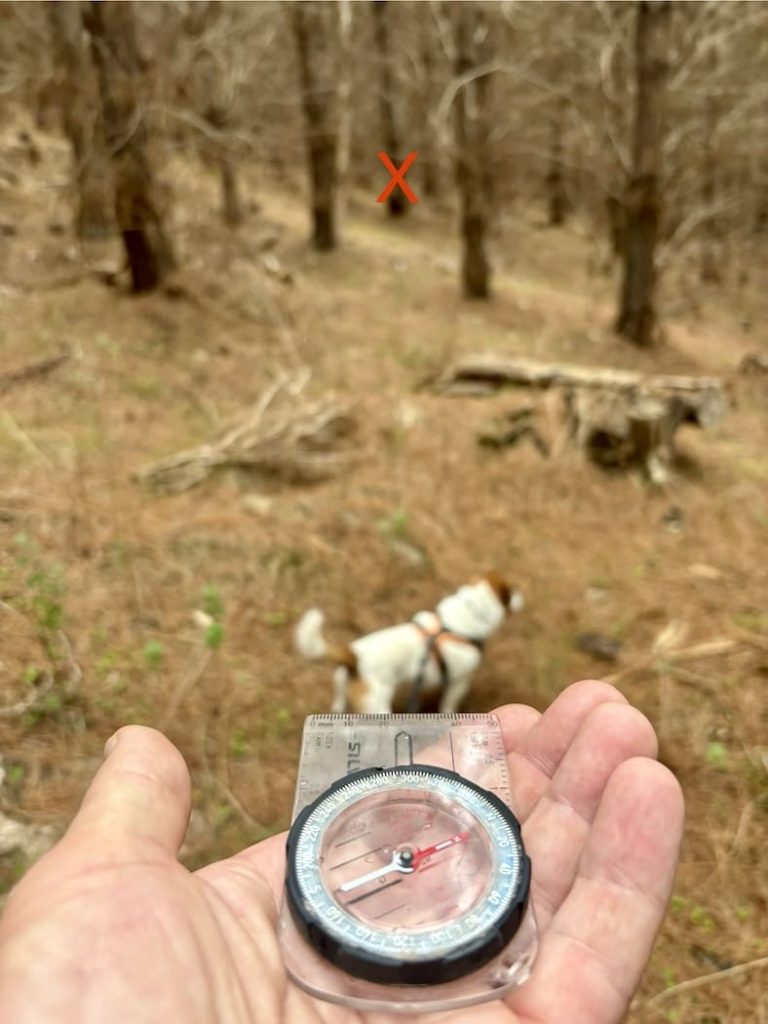
- Stand at your starting point. Turn your body while holding your compass level and pointing straight ahead until the red end of the needle is over the red arrow in the bezel underneath.
- With these aligned, sight along the arrow on the baseplate and identify a feature ahead directly in line with it. The further away the better as each time you take a bearing you will introduce a tiny error. It needs to be something that will either stay in view even if you dip down, or be easy to see again if you lose sight of it. I like to identify two features just in case I lose one.
- Now you can put your compass away! All you have to do is walk to the target by whichever route is the most practical, enjoying the scenery as you go. It doesn’t have to be a straight line.
- DO NOT take another bearing before you reach the target. Unless you have remained exactly in line it will be less accurate than the first one.
- Once you reach the target, take out your compass and repeat steps 1 to 3.
Eventually you will reach your destination.
Some Advanced Points
- A good backup check that you are staying on your bearing is to take a back bearing when you reach your target. All this means is to repeat step 1 but this time put the opposite (usually white) end of the needle over the red arrow. This should point your compass directly at the place you just walked from.
- There will always be a few degrees of error, so in poor visibility you could still miss your final destination. A good idea is to identify a catching feature on your map that is past the destination. Then if you reach this you know you’ve overshot.
- Watch out for magnetic anomalies. The most common of these will be other items you are carrying such as earbud cases, phones etc. Just try putting these near your compass and see what happens!
- It’s a good idea to keep an eye on the time and your estimated speed so you know roughly when you should reach your destination.
- In fog especially above the tree line you can use a second person as your target. By having prearranged hand signals you can move them left or right until they’re on the bearing at the limit of visibility. Each of you takes turns leapfrogging the other.
- A route in hilly terrain will involve several legs to keep you on the ridgelines. Its main benefit may be to avoid going down the wrong spur.
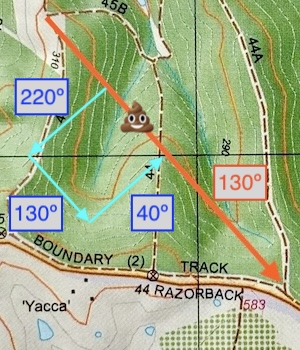
- If there is an uncrossable area on your bearing, you can move around it by adding or subtracting 90 degrees to your bearing and proceeding at right angles while counting your steps. Then walk along the original bearing past the obstacle, then navigate in reverse the same number of steps once you pass it.
* What Is Magnetic Declination?
Magnetic declination is the difference in degrees between the direction to the magnetic North Pole (currently in northern Canada) and True North. It varies with where you are in the world and also slowly with time. In Australia it goes from 2°W in southwest Western Australia to 15°E in Tasmania.
On our Hattah Lakes walk, we calculated that over a 4km distance, failing to account for the local declination would have put us out by 700m at our destination. Very simply, any declination east gets taken off the compass, and any west gets added.
Next article: Flinders Spectacular 2024, Mambray Creek


This is a really concise and informative post. Thank you.
Thanks, this is a good and easy to follow explanation. Now to try it in the field and be competent before heading off to Jagungal.
Amazing easy to follow and get started guide.
The more you practice, the easier it gets.
Thanks for the informative article.